Cast Iron Steak | Seared Chuck Eye Steak
Howdy folks, and thanks for stopping by the website! Today, I'm in Wooster, Ohio at the Certified Angus Beef test kitchen. Why? Well, when I want the best beef, Certified Angus is where I go. When Certified Angus Beef needs the best at cooking with cast iron? They call me.
We got together to demonstrate how you can use cast iron to create a perfectly cooked steak in minutes. I'm going to share the best tips and tricks so you can impress everyone you know with a perfectly seared piece of meat.
Choose the Right Cut of Meat
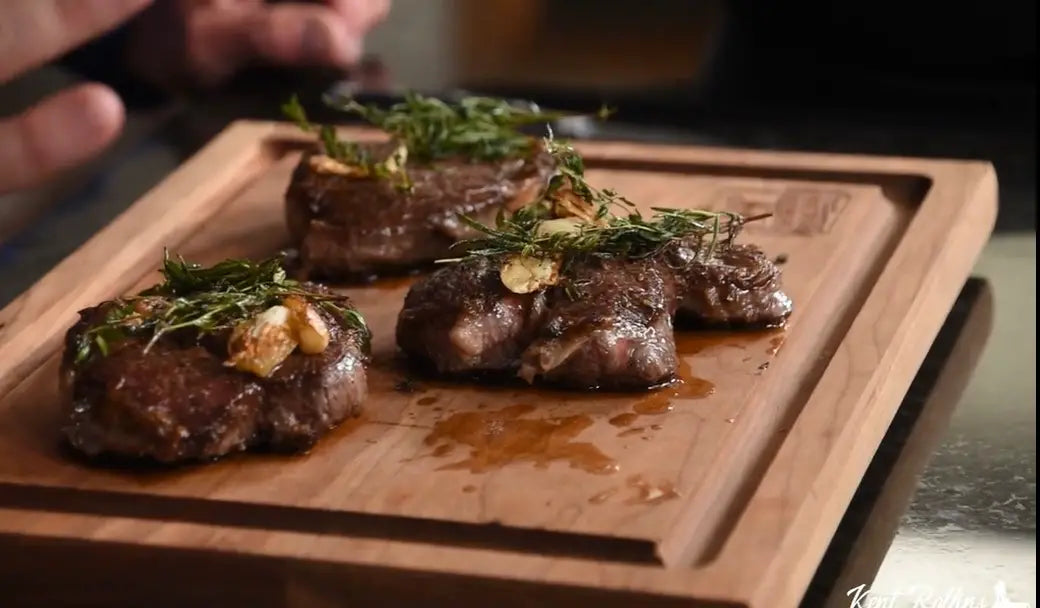
Today, we are using what I like to call the "poor man's ribeye." You may have heard it called the "chuck ribeye" by your butcher. As usual, you want a steak that has a good color with many lines of marbled fat running throughout the meat.
We appreciate you sharing our recipes with your friends and family!
When you have beef this good, all you need to start is a dusting of salt and pepper. Once you've done this on both sides, it's time to get the cast iron hot.
The Perfect Sear
One of the first things you should remember when getting ready to sear a steak, is that the cast iron needs to be hot before you even begin. Whether you're using a gas stove or a fire, I find that it's ready when you can hold your hand an inch above the cooking surface and feel the heat. I'm talking about serious heat, the kind where you want to move your hand away.
Tip: Use an oil or fat with a high smoking point to avoid smoke.
For this steak, we used a mixture of canola oil and olive oil. Olive oil has a low smoking point, so we paired it with Canola. The last thing you want is to go setting all of the fire alarms off in the house because you used an oil with a low smoking point. You can also use avocado, grapeseed and other cooking oils.
Once we add the oil, I like to add a little beef tallow and butter. I add these to give the crust a little more flavor. Now the cast iron is ready for the meat. You can go ahead and turn the oil down if you're getting smoke. The heat will not reduce much when you lower your heat source, because cast iron holds heat really well.
Sear the steak about 2-3 minutes on each side. You can either place the sides of the steak right up against the edge of the pan to sear the sides or hold the steak up with some tongs to do it. Just don't squeeze the steak hard enough to push any of the juices out of it.
Once you flip the steaks, you can add butter, garlic, and herbs to the skillet to enhance the flavor of the crust. Use the charred herbs and garlic to garnish the steak. These will create a beautiful plate with an intoxicating aroma.
As always, Shannon and I thank you for stopping by and sharing our food and videos. Please subscribe to our YouTube Channel and click "like" on all of your favorite videos. We'll see y'all down the road for more cast iron tips and tricks. Check out our Cast Iron playlist when you have a minute. I promise you'll learn something new.

Cast Iron Seared Chuck Eye Steak - Cowboy Kent Rollins
Ingredients
- 2 8 ounce chuck eye steaks
- Salt and black pepper
-
2
tablespoons
cooking oil
avocado, olive, etc.
- 2 tablespoons butter
-
2
large garlic cloves
smashed
-
Fresh herbs
rosemary, thyme
Instructions
- Place a cast iron skillet over high heat. Let the skillet get hot then reduce the heat to medium and add the oil and butter.
When the butter has melted, add the steaks to the skillet and cook about 2 to 3 minutes, or until a good crust appears. Flip the steaks over and add the garlic cloves and herbs to the skillet.
- Continue cooking the steaks, basting occasionally with the butter. Add more butter if needed for basting. Cook until the internal temperature of the steaks is 130 to 140 degrees F. for medium-rare.
- Let rest a few minutes before cutting and servings.

