Australian Damper Bread

Kent Rollins Traditional Australian Damper

G’day, mate! We’re having a great day at camp down under and … what? Why am I talking funnier than usual? Well, as y’all know, America isn’t the only place on the globe with a good number of cowboys and people who cook outside on fires.

We have a lot of subscribers and active viewers from New Zealand and Australia, and recently I was asked if I could try out one of their traditional camp foods. They call it “Bush bread” and “Damper” – because it’ll dampen the appetite until you can get to a proper meal. I’d probably call it “camp bread” but I’m going to try it the real, authentic way they do it down under. We’re going to cook this bread directly on some hot ash.

The Cowboy Touch

Normally, this bread is made with ingredients that will last a good long time. Traditionally, this was something that could be kept in your pocket and stored for a long time without spoiling. Sort of like our Hard Tack recipe.  I’m going to add some cooked bacon and onion to this loaf, so it won’t last as long as a traditional damper would. Of course, it’s going to taste so good it won’t last that long, anyway.


Damper Dough

This is a really simple dough. Start by mixing together the flour, the baking powder, and the salt. Make yourself a well in the middle and start with about a half a can of evaporated milk. I’m using canned milk because I use it a lot on ranches because it doesn’t require refrigeration and great to use when camping. You’ll mix the dough well here. If it’s sticky, add more flour. If it’s crumbly, add more milk. Continue until you’ve got a good ball of dough that doesn’t stick to your hands.

Lay the dough out on a floured surface and knead in the bacon and onions. Be sure to cover the dough well with a thick layer of flour. This will help insulate the dough from the ash as it bakes. 

Cooking Right on the Ash

I learned that you want to start your fire about 30 minutes before you really need it. It’s best if you use small branches so that the fire turns to ash a little quicker. Once you’ve got a good pile of hot coals, go ahead and move the coals off to the side until you’ve got a nice pile of hot ash in the center.


I really mean it – put the dough right on the hot ash!

Place the flour-coated dough in the center of the ashes. Cover over the top of the damper dough with some hot ash and let sit for about 45 minutes. It’s done when you thump it and it sounds hollow. 

The trick here really is to cook with ash and not actual coals, because the coals will be too hot and you want a low and slow bake on this bread. As it cooks, you can also use a thermometer and pull the bread when it reaches about 250 degrees F. 

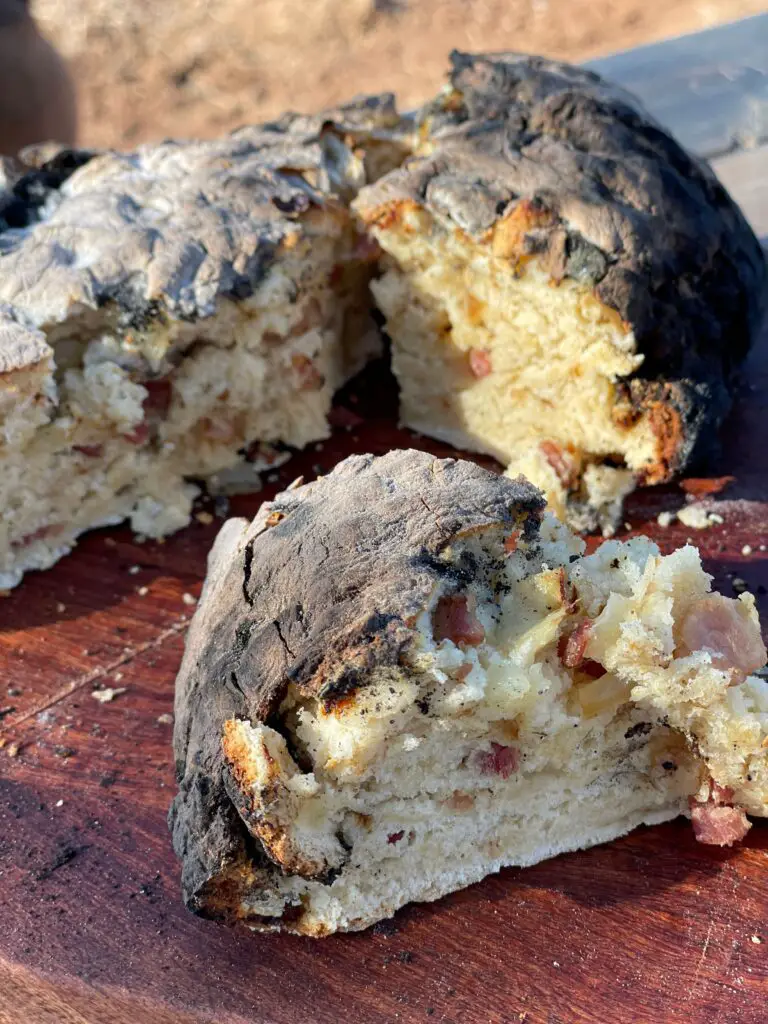
This is definitely something you want to give a try. When tasting this, it’s surprisingly moist and you don’t get a burnt taste at all. It’s a light smoke flavor with a good crunch on the outside and soft in the middle.  

Kent Rollins Traditional Australian Damper

Australian Damper Bread – Cowboy Kent Rollins

Prep Time 15 minutes
Total Time 1 hour 10 minutes
Servings 1 loaf

Ingredients
  

  • 6 pieces thick-cut bacon chopped
  • 1 yellow onion diced
  • 4 cups all-purpose flour plus more for sprinkling
  • 2 heaping tablespoons baking soda
  • 1 teaspoon salt
  • 1 ⅓ cans evaporated milk plus more as needed

Instructions
 

  • In a cast iron skillet over medium heat add the bacon and cook it for about 4 minutes. Stir in the onion and continue to cook until.
  • Add the flour, baking soda, and salt to a large bowl and mix well. Stir in the milk, 1/2 can at a time, and fold in with a spoon. Keep adding milk until a dough ball is formed. You don't want it sticky.
  • Empty the dough out onto a floured surface then add the bacon and onions on top. Knead for about 5 minutes, and the bacon and onions are evenly mixed in. Flatten the dough to about 1½ inch-thick and dust the outside heavily with flour.
  • Lay the bread directly on top of hot white ashes. Cover the dough lightly on the top with more ashes and let it bake for about 45 to 55 minutes. Finished damper should sound hollow when you thump it.
Tried this recipe?Let us know how it was!